Wednesday, December 12, 2012

Lobster Pasta x2

My friend Cori Sue of the blog, Bitches Who Brunch, sent out a pretty funny email for lobster night. It read:
Ladies,
We're throwing an intimate dinner party this Friday at Diana's home.
Why: 
It's December!
Lindsey is in town, and recently started culinary school up in New York City. She's gifted in the kitchen.
Diana just returned from France, and blogs away about her culinary prowess at the Happy Hostess Blog.
Cori Sue didn't return from anywhere, nor can she cook. But, she snagged some complimentary lobsters from the Lobster Man
So, we're cooking a fancy pants meal of salad, lobster, dessert, wine, prosecco and the like!
After a lead in like that, I spent an entire week trying to come up with some good recipes using the lobster that was being sent this way courtesy of The Lobster Man. We tossed around idea after idea (Lindsey's were far more culinarily advanced than mine), and I finally settled on a pasta dish out of the Silver Palate cookbook, Lobster with Tarragon. It is a red sauce with tons of lobster meat, cream, and obviously tarragon. I put my own spin on it by using fresh tarragon instead of dried, as well as adding tons of crushed red pepper flakes to give it a little kick. I am not used to having people I don't know very well for dinner, and I never cook anything I haven't test driven before, so I was a little nervous about this dinner party and really wanted everything to go smoothly. I always get a little nervous about having enough food, wine, whether everyone will mesh well, etc, but when using someone else's resources, I really don't want to screw anything up. A phone call was placed to The Suz, who, for those of you who have not met her, is the ultimate in dinner party throwing. The authority. She puts my mind at ease every time I freak out, and her wisdom about everyone being too many wines deep to notice if your dessert is terrible is genius. She totally came through this time with not only a hand decorated wreath for my front door (obviously, who wouldn't make a hand decorated wreath), but another amazing recipe for a lobster sauce. And it was a really good thing too, because I did not realize how much sauce #1 would cook down- cautionary tale about test driving recipes at higher-than-normal-pressure dinner parties. The recipe she gave me was actually for a dipping sauce which I just put the chopped lobster meat in and tossed with the pasta. It is actually an amazing recipe from wayyyy back in the day when she and my dad still had pretty aggressive dinner parties. They had a good friend that was the chef at a French restaurant, and one time when he was at the house and they were making lobsters, he whipped up this sauce. It is super French, super 90s, and super delicious. I loved it. It only has four ingredients and no one ever measured anything, so I had to use my best judgment. Major props to The Suz for, yet again, totally coming through on this one.

Luckily both of the sauces turned out really well! I ended up deciding to do one tossed with ziti and one with spaghetti so they would be different. I was really pleased with both results and will definitely make each of these again when I have lobster meat on hand.

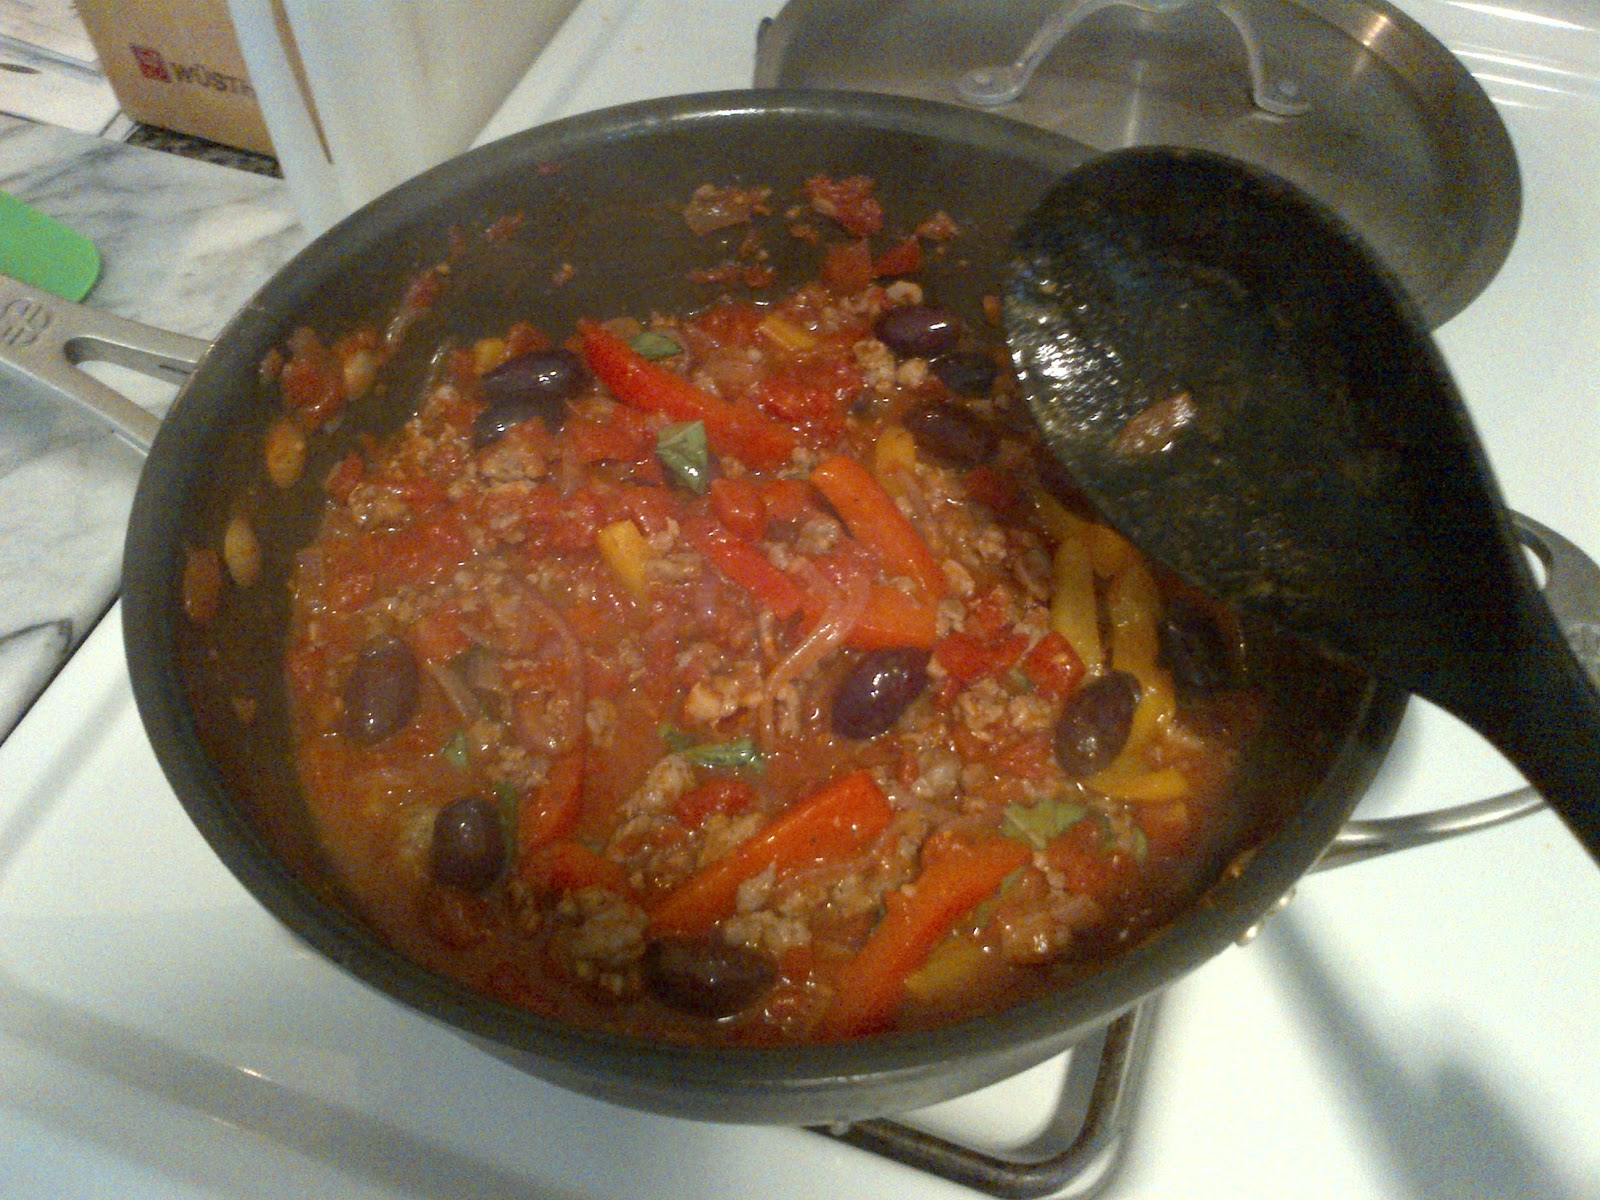
Lobster with Tarragon and Tomato Cream Sauce

Ingredients:
-2 tbs olive oil
-1 yellow or white onion, finely chopped
-1 large can stewed whole tomatoes
-1/3 c fresh tarragon
-salt and pepper to taste
-1 c heavy cream
-crushed red pepper or cayenne pepper
-1/2 lb lobster meat
-1 box of pasta (I used ziti)
-sprig of fresh tarragon for garnish

Directions:
-Saute the onion in the olive oil in a heavy saucepan (pot) until the onion is tender
-Drain and chop the tomatoes and add to the onions
-Add the tarragon and salt and pepper to taste, reduce the heat and simmer for about 30 min
-Remove mixture from heat and let it cool slightly. Puree in a food processor or food mill (this step is optional but if you would like a smooth sauce then go ahead and puree it)
-Return puree to the saucepan and add the cream. Feel free to add extra cream if you would like the sauce lighter (I did)
-Simmer the sauce for about 15 minutes, stirring often, until it is slightly reduced
-Taste the sauce, add more salt and pepper if needed, and then add about 1-2 tsp of crushed red pepper or 1/2 tsp of cayenne, to taste
-Add the chopped, cooked lobster meat and cook another 5 minutes until the lobster is heated through
-Boil the pasta in salted water. Toss with the sauce, and garnish with the fresh tarragon.


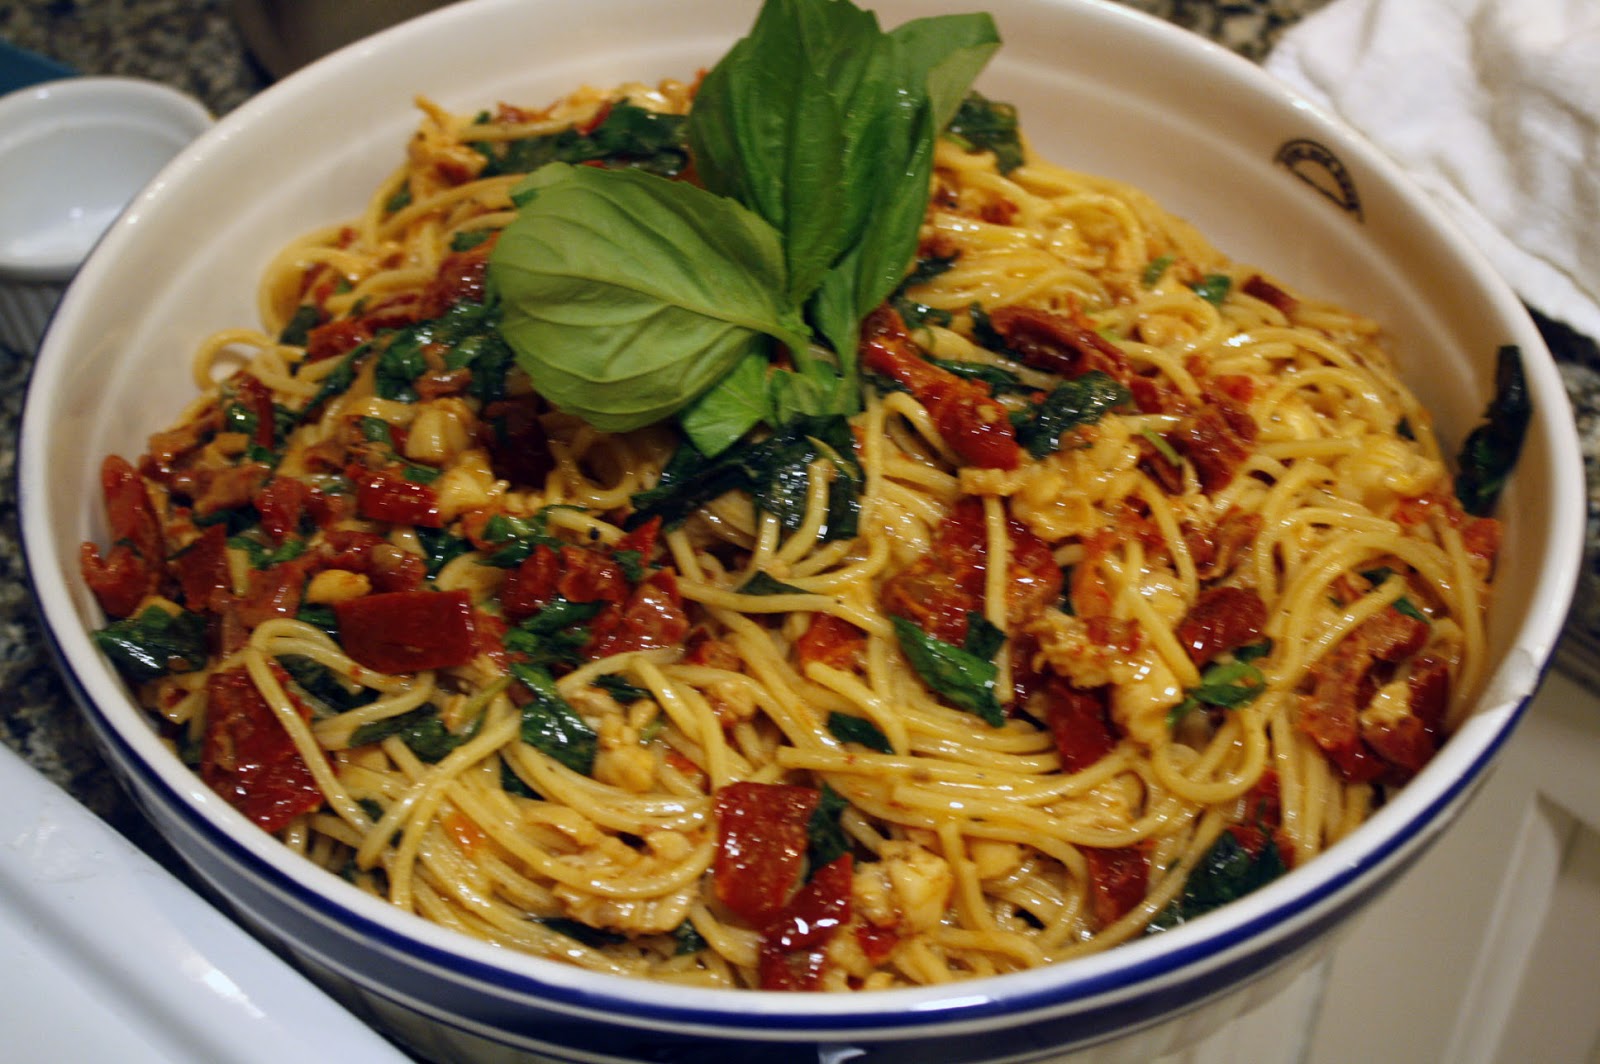
Marcel's Lobster Sauce

Ingredients:
-2 sticks of butter
-1 c of drained and chopped sundried tomatoes
-1- 1.5 c of creme fraiche, depending on taste
-1- 1.5 c chopped fresh basil
-1/2- 1 lb of chopped, cooked lobster meat
-1 box pasta (I used spaghetti)
Directions:
-Melt butter in a heavy saucepan
-Add chopped sundried tomatoes and simmer for 5-10 minutes
-Add creme fraiche and simmer for another 3 minutes
-Add the lobster and cook until heated through, about 3 mins
-Boil the pasta in salted water until cooked
-Right before serving, add the chopped basil to the sauce and stir in.
-Toss the sauce with the pasta, garnish with fresh basil.


Tuesday, December 4, 2012

Salmon with Lentils

This is a great variation on one of Ina Garten's recipes, the classic salmon with lentils. It is the perfect pairing for winter as it is comforting and filling without being too heavy. The whole recipe only takes about 45 minutes from start to finish, so perfectly doable on a weeknight. My friend Liz and I had a simple green salad with it which was perfect. Both the salmon and lentils are very forgiving so if you make a mistake it should still turn out beautifully.


For the Lentils

Ingredients:
-1 cup of lentils
-3 tbs olive oil
-1 onion, diced
-2 cloves of garlic, minced

-1 carrot, diced
-1 rib of celery, diced
-2 tsp fresh thyme (optional)
-1-2 tbs tomato paste
-2 cups chicken stock or broth
-1 tsp salt
-1 tsp pepper

Directions:
-Pour boiling water over the lentils (in a heat proof bowl) and let sit for 15 mins
-Saute onions in olive oil until translucent.
-Add garlic and saute for 2 more minutes.
-Add carrots, celery, thyme, tomato paste, lentils, salt, pepper, and chicken stock and bring to a boil.
-Simmer for about 20 minutes until the lentils are soft. Add more chicken stock if it looks dry, if you add too much don't worry- just use a slotted spoon to scoop everything out when you serve. Add salt and pepper to taste.


For the Salmon

Ingredients:
-2-4 salmon filets, with skin on
-2 tbs olive oil
-2 tsp each salt and pepper

Directions:
Preheat oven to 375. Heat an ovenproof skillet/pan on high until it is hot.
-Rub olive oil over salmon
-Sprinkle each filet all over with salt and pepper
-Place the salmon filets, skin side down, on the skillet. Cook for 2 minutes and then turn over and cook for another 2 min on the other side.
-Place entire skillet/pan in the over for another 5-7 min, or until salmon is cooked to your desired temperature. 
-Serve each piece of salmon over a bed of lentils.

Thursday, November 29, 2012

Festive Table Scape

A good friend of mine, Cori Sue Morris, writes a really awesome blog, Bitches Who Brunch. She recently mentioned that she had 10 lobster tails being sent to her, and would I be interested in cohosting a lobster dinner party with her and our other friend, Lindsey Becker, who has recently started cooking school! I of course said yes and started thinking about recipes, etc. One of my favorite parts of having a dinner party is setting a fun, festive table. Mine are always very basic but I think it is nice to spruce it up with colored napkins and other small items on the table. This is a particularly easy and inexpensive one to recreate, as it requires very little- a white or grey tablecloth (I borrowed another one of my friend Kendall's...again), burgundy or red napkins, an assortment of silver napkin rings (or silver ribbon!), a few silver ornaments (you could spraypaint pinecones, holly leaves or glass ball ornaments if you wanted to DIY), 2 pillar candles and some hurricanes, and some white roses for the centerpiece. I wish I could have gone totally above and beyond, but most of us (myself included) are on budgets so I improvised with what I wanted to spend. Usually when I buy entertaining gear, my go to stops are Homegoods (far away so only if I'm feeling ambitious), World Market, and Crate and Barrel. C&B has cloth napkins for $3.95 each which I think are a great deal since you can throw them in the washing machine and dryer. Everything I used in this table scape is from there, save for the hurricanes which are from World Market. At both places (WM especially) you can get nice looking silverware, glassware, and plates etc. on the cheap which I love. I think that food looks best on plain white plates, but depending on the season I'll add in some color.


Today when I went to C&B, I had no idea what I wanted to do with the table. All I had was 6 napkin rings (I needed 8) and the tablecloth. I wanted to match the napkin rings, but they were out of the ones I had previously bought so I bought 2 each of the other silver ones that were there and decided to mix and match which I think is cute and slightly less predictable than using the same one for each person. I also got some silver ribbon in case I decided to use that instead, which I think is awesome in place of a napkin ring and sometimes even cuter. When I am setting a table, I like to start with either the tablecloth or placemats, then pick the napkins, followed by candles and centerpiece, followed by the "accessories." It is kind of like putting an outfit together, and you want to get things that coordinate with each other as well as other items in your entertaining "wardrobe." Some of the items are not necessary, but my mother always sets a beautiful table which includes more than all of those so I like to try to recreate as much as possible (my tables will never be as nice as hers but I continue to try!).

Today, I had no idea what color napkins to get and originally grabbed red. After thinking my table would be a little too Christmasey, I went with a burgundy color I thought would be really pretty against silver and grey but still festive. I then picked out some grey candles (white would have been fine but the grey are awesome), and realized all of the silver ornaments were on sale. I grabbed a bunch of the less than $2 ones (12 or so) to spread around the table. If you were feeling generous, you could put a few at each guest's place as a take away. You can also use them on your tree after dinner, or put them in a glass bowl on your front hall table for a festive decoration.

In terms of centerpieces, I always prefer to do a simple one on my own. You can buy a bunch of flowers at the grocery store and arrange them yourself which is about $80 less than buying a pre made arrangement. I decided to stick with the white/silver/grey/burgundy theme and do an arrangement of white roses. While I was checking out, it dawned on me that adding some fresh cranberries to the flowers would tie everything together nicely so I grabbed a bag of those and figured I'd fit them in somewhere, either on the table (which I opted against since I am on a borrowed tablecloth and do not want to stain) or with the flowers. Short arrangements are preferable so that your guests can all see each other, so I used a short vase and cut the flowers down a little more than half way and removed the leaves for a cleaner look. I put the flower food in the water and added some cranberries. I ended up adding more at the end, about 1/2 the bag total. I am pretty pleased with myself and it was incredibly easy to do, you just have to fuss with and keep cutting/rearranging the flowers until they look right.


Once I had the flowers, candles, plates, and napkins on the table (I don't put glassware because guests are always drinking already), I spread out the ornaments. I was worried it was going to take me about 5 hours of arranging and rearranging to make it look like I hadn't arranged them at all, but for whatever reason it worked out perfectly on my first try. I wanted them to be sort of grouped but also random. Anyway I like how they look and am going to leave them be. Last stop is silverware, most of which I got on there save for a few place settings (which I will need for dinner tonight). Again, this is very basic but so much nicer than seeing a wood table with white paper napkins and nothing else. Now off to make some Christmas Candy!

Monday, November 26, 2012

Roasted Chicken from Bistro de l'Hotel

I recently went to a great French restaurant with my family and a group of people. The menu was set because the local experts we were with had wanted to make sure that we got to eat "the best chicken ever." Granted, they were very nice Bresse chickens (all white with blue legs/feet and delicious) which we don't have access to in Washington (that I know of). I swapped in an organic whole chicken from Whole Foods which was totally fine and tasted about the same. Usually when I roast a chicken, I stuff it with either lemons or onions/garlic and bake it with a few pads of butter on the skin at 350 for an hour and a half. The method that the restaurant used was totally different- they used a mixture of olive oil and clarified butter (which burns at a higher temp than regular butter) and cooked the chickens at a temp of 475 for a total of 45 minutes (nothing inside the chicken). The result is a really juicy chicken with crispy, perfectly browned skin that comes out surrounded in the best chicken juice ever. We also had roasted asparagus and mashed potatoes with our chicken where were the perfect accompaniment (both recipes for those are on my blog under the lambchops recipe). One whole chicken serves 4 very well but can definitely be stretched to serve 6, or you can make 2 chickens and have leftovers.


For the Clarified Butter:
-Bring 2 sticks of unsalted butter to a boil in a small pan. Use a sieve to scrape the white foam off the top of the butter as it boils. Once you have gotten most of it off, strain the rest through the sieve or a pice of cheesecloth. Put aside. All you are doing is removing the white milk proteins that will burn if you cook the butter at a high temp and we don't want that.


For the Chicken:

Ingredients:
-2/3 c clarified butter
-1/3 c olive oil
-1 whole chicken
-2 tbs fresh pepper
-2-3 tbs salt

Directions:
-Set oven to 475 degrees.
-Mix the clarified butter with the olive oil and let cool until it turns into gel.
-Rinse and dry the chicken (sometimes it comes with liver/kidneys/neck inside the cavity. If it does, make sure you remove these and throw them away or save for stock). It is important to dry the chicken thoroughly, if there is water on the skin then the chicken skin will steam instead of brown nicely.
-Spread about 2/3 of the butter/oil mixture on the chicken (I used the rest of it in the mashed potatoes in place of regular butter which was great, or you can save it in the fridge for another chicken). Make sure you get the butter/oil on both sides of the chicken.
-Sprinkle half of the salt and pepper on one side of the chicken, and half on the other side of the chicken.
-Place the chicken in a roasting pan (brownie pan will work just fine) upside down and roast for 20 minutes, upside down. 
-After 20 minutes, turn the chicken break side up and continue to roast for 25 more minutes or until a food thermometer reads 165 degrees for internal meat temp.
-Cut off the legs and breast meat, let sit in the chicken juices while everyone serves themselves. 


Wednesday, November 21, 2012

Vanilla Bean Creme Anglaise

Now that the kids in my family are all old enough, we usually each make something for Thanksgiving dinner at my parents' house. My task last year was dessert, and everyone liked it so much that they asked me to make the same thing again. Part of the dessert involves a vanilla bean creme anglaise, which, if you have not had it, is absolutely to die for. I just dunked a strawberry in it and was in heaven. It goes with everything. It is incredible with chocolate cake, fresh fruit, apple tarts, pumpkin pie, and everything in between. It is a little bit like a much tastier and slightly thicker melted vanilla ice cream. If your task is dessert this year, or if you have a dessert coming up that you need to serve (even if it is store bought pumpkin pie) your homemade creme anglaise will take it to the next level and everyone will be licking their plates. It is super easy and only takes about 15 minutes to make, from start to finish. You can serve it warm, cold, or at room temp.


Ingredients:
-1 cup whole milk (you can also use cream- I used 2/3 c 1% milk and 1/3 c heavy whipping cream)
-1 vanilla bean, cut in half and seeds scraped out into the milk (use 1 tsp of vanilla extract in a pinch)
-4 egg yolks (reserve the whites for meringues later or an egg white omelette)
-1/3 c granulated sugar

Directions:
-Scald the milk with the vanilla bean and seeds in it (this means bring to a boil for about 25 seconds and then shut the heat off. A skin will form on the milk which will be strained out later). Turn off stove and leave there while you do the eggs/sugar
-In a separate bowl, whisk together the egg yolks and sugar
-Pour about 1/3 c of the milk into the egg mixture, whisking constantly. (This is a process called "tempering," which ensures that the yolks will not scramble)
-Pour the egg/milk mixture into the pot of milk and whisk. Cook at medium heat for about 5 minutes until the creme anglaise is the consistency that you would like.
-Pour the mixture through a strainer into a bowl and set aside to cool.
(I accidentally made mine a little thicker than I wanted so I added about 1/4 c heavy cream and thinned it out a little. It still tastes amazing and now there is more. You can also use milk or half and half to thin it out after you are finished).

The creme anglaise will keep for 3 days refrigerated so feel free to make it in advance like I did.


Tuesday, November 20, 2012

Hoisin Chicken with Cucumber Salad

A few years ago when I worked in an office, I used to spend a small chunk of the afternoon looking for delicious things to make for dinner. I came across several great recipes, which I would print out and put in the folder section of the recipe binder my mother made for us. The other night, when I asked my friend Kara what she wanted for dinner, her immediate response was "something healthy" (clearly my love of butter has not gone unnoticed over here). I couldn't think of anything healthy and delicious that I hadn't made recently, so I searched through all of the printouts I had in my binder and found this gem. I was nervous that it wouldn't be very satisfying or tasty, at 385 calories a serving, but I could not have been more wrong. This is easily one of the best meals I have ever made and it will definitely go in the repertoire. We went one step further than the recipe and made a green salad with cilantro to serve with the chicken, and it was an amazing addition. The chicken is kind of sweet and spicy, and the cucumber salad is cool and delicious. The whole meal tastes fresh, asian, light, and really flavorful. I ate it again the next day for lunch and was not disappointed then, either. The whole meal takes about 30 minutes to make, from start to finish, so it's totally feasible for a weeknight. The marinade is best made in a food processor, but would be fine if you just chopped everything finely. It makes quite a bit, so I froze some of the marinade and chicken thighs (separately) for another time. Hope you enjoy this dinner as much as I did!

For the Chicken

Ingredients:
-1 package of skin-on chicken pieces (I used thighs and legs. Thighs are really flavorful and very inexpensive. Breasts are fins but make sure you get the skin-on kind because the marinade is a little kicky and you don't want it on the bare chicken).
-3/4 cup hoisin sauce (I got it at safeway in the Asian section)
-3 scallions, chopped
-5 cloves of garlic
-1 2-inch piece of ginger, sliced
-1 jalapeno pepper, stemmed and halved (remove 1/2-3/4 of the seeds to tone down spiciness)
-zest and juice of 2 limes
-2 tbs rice vinegar
-1 tsp each salt and pepper

Directions:
-Put everything except for the chicken in to a food processor and blend until smooth. If you dont' have a food processor, mince the ingredients and mix everything together.
-Pour over chicken and marinate for at least 30 minutes.
-Grill or broil until chicken is at an internal temp of 165 degrees.


Cucumber Salad

Ingredients:
-1 cucumber, peeled and sliced thinly (I used the side of the cheese grater that has the long thin slicer but a knife is fine)
-1/2 red onion, peeled and sliced thinly lengthwise
-1/2 cup rice vinegar
-2 tbs sugar
-1.5 tsp salt
-1/4 cup ice cubes

Directions:
-Bring the vinegar, salt and sugar to a boil. Remove from heat and add the ice
-Toss with the cucumber slices and onions. The vinegar mixture will wilt the cucumbers and onion slices which will turn into marinated, delicious goodness. Store in fridge until ready to serve.

For the Green Salad (Optional):
Put in a salad bowl: 1/2 head of romaine lettuce (washed and chopped), 1/3 cup chopped cilantro. Toss together with about 1/4 cup of the dressing from the cucumbers (there will be plenty).

To Serve: Put green salad on the plate (if you are serving with it), top with a scoop of the cucumber mixture, place a piece of chicken on top of everything. Garnish with a sprinkle of fresh, chopped cilantro or a lime wedge.


Thursday, November 8, 2012

Fresh Fruit Tart on Puff Pastry with Berry Glaze

This is one of my absolute, all time, favorite desserts. The homemade pastry cream is probably the most delicious thing I have ever put in my mouth, and the puff pastry is light and airy, and the fruit on top is just perfect with the cream. My mother used to make this for VERY special occasions when we were little (read: things we were not invited to) and if we were lucky enough, we got a small piece after it had been served. I am not surprised, because it takes a good bit of effort, but I literally dream about this dessert.  It can be made with any type of fruit that you like and can find fresh in the store. The assembly takes a little bit of time, but it is all fairly simple. The pastry cream is the most difficult part of the tart, needing constant whisking and babysitting (about 40 min total...not too bad). It is simple enough, but not cooking or cooling it for long enough is a fatal mistake as it will be too thin. Once you have your spoon in the mixture, however, you can sort of tell the kind of consistency you are working with and need to get to so it makes sense. The pastry cream needs to cool and set overnight, or all day long, so you want to make this in advance. It can be made up to a few days in advance and stored. I accidentally made my tart very patriotic looking which was perfect for election season, but I have also used kiwis and other colors of fruit. IMO berries are the best and the easiest to work with because you can sort of just sprinkle them on. In a pinch, if you don't want to make homemade pastry cream (I don't blame you but it IS worth it), you can make homemade whipped cream (see recipe on here) and use that instead. The pastry cream is better though. Trust me it is GOOD. This tart will serve up to 20 people depending on how big you cut the slices, or you can put the leftovers in the fridge and eat it for breakfast all day long.


Homemade Pastry Cream

Ingredients:
-2 cups of milk (first choice whole, second choice 2%)
-1/2 cup of sugar
-4 tbs flour
-2 egg yolks
-1 tbs butter
-1 tbs vanilla

Directions:
-Scald the milk in a saucepan. This means heat it to the point where it just boils for a second and forms a skin on top.
-While the milk is heating up, whisk the sugar and flour together in a metal or glass bowl, or the top of a double boiler. Put a pot of water that the bowl can sit on top of on the stove to simmer.
-When the milk is scalded, remove and throw away the skin and pour the milk into the four/sugar, whisking constantly. Place the bowl over the simmering pot of water and cook (constantly stirring) for about 15 mins until the mixture lightly coats the back of a spoon.
-Add the egg yolks while whisking- if you stop whisking then the yolks will scramble and you will have lumps in your cream. These can be strained out at the end but it is less annoying if you just whisk like crazy. 
-Cook that mixture for about another 15 minutes, or until the mixture heavily coats the back of a spoon (pic below is a few minutes before it is done). Remove from the heat.
-Add butter and vanilla and mix well. 
-To chill the pastry cream- place a piece of saran wrap over it, touching the pastry cream so it doesn't form a skin on top. Put in fridge for at least 8 hours. 


Puff Pastry: 

You could make this but I don't know why you would spend countless hours when there is a perfectly fine version at your grocery store. It is a monumental pain in the ass to work with the homemade so don't make your life any more difficult than it needs to be. Pepperidge Farm has a good one, and the one I used recently was some fancy version from Whole Foods that tasted exactly like all of the others. Long story short, find it at the grocery store.

Instructions:
-Defrost one sheet of puff pastry ( NOT phyllo dough) according to the instructions on the package. I usually let it sit on the counter until it is pliable without breaking. Or you can defrost it in the fridge the day before.
-Depending on what size tart you want to make, sprinkle flour on your counter and roll out the puff pastry to the size of a cookie sheet. You can also just leave it the size it comes in.
-With a fork, poke holes all throughout the pastry. This will prevent it from rising to the extent that it should, but we want a fairly flat puff pastry so you need to give it some airholes or you will have what looks like a liferaft.
-Bake according to the instructions on the package and set aside.


Fruit Tart Assembly:
-Spread the cooled pastry cream on top of the cooled puff pastry.
-Arrange your fruit selection on top.
-Use a brush to gently coat with or drizzle the glaze on top of the fruit tart (pic below is pre-glaze, main pic is post-glaze).

Glaze:
-Put 3 tbs of raspberry or strawberry jam in a small pan. Add 2 tbs of water and bring to a boil. Cool.


Sunday, November 4, 2012

Roasted Butternut Squash Soup

Anyone that knows me well will tell you that squash is NOT my favorite food. I have about 2 bites of it at Thanksgiving and that's it. I rarely cook with it, but one of my girlfriends brought over a couple of butternut squashes during the hurricane recently (there was nothing else to do but cook and eat). We decided to make roasted butternut squash soup since I am now the proud owner of a food processor, and it was shockingly delicious. I ate an entire bowl and have had it for lunch every day since! It is really nice as a whole meal or as a starter. My friend Kara got all fancy and served the soup with a dollop of sour cream (love) on top, and then sprinkled on craisins, scallions and sunflower seeds. It looks really pretty and was really tasty! It just so happened that I had made chicken stock the day before, so we used homemade in the recipe which I think made a lot of difference. Store bought is fine, but if you have the time like we did then it is worth it to make and use homemade. That recipe another time. If you don't have a cuisinart, the squash gets really soft so you could just use a potato masher or a blender to puree it. It is definitely smoother after a trip through the food processor but also makes a pretty big mess. Fyi.

Ingredients:
-1 butternut squash
-1 carrot, grated
-1 onion, chopped
-5 cups of chicken stock
-1 cup of apple cider
-1 tbs freshly grated nutmeg
-1 tbs curry powder
-salt and pepper to taste
-olive oil
-1/2 cup heavy cream
-sour cream, sunflower seeds, craisins, scallions for serving

Directions:
-Cut the squash in half and remove the seeds. Drizzle with olive oil, salt, and pepper, and roast, skin side up, for 1 hour at 350 degrees. When the squash is soft, remove the skin and cut it into cubes.
-Saute the chopped onion and carrot in about 2 tbs of olive oil until the onion is translucent.
-Add the squash, chicken broth, apple cider, nutmeg and curry powder. Bring to a boil. Simmer for about 30 minutes until the vegetables are soft enough to mash or blend in a food processor.
-In 3 batches, blend the soup in a food processor or blender until it is smooth. Put back into the pot and season with salt and pepper to taste.
-Stir in the heavy cream and serve with a dollop of sour cream and the above condiments.

Wednesday, October 31, 2012

Shrimp Scampi

When I was little, I hated sailing lessons so much that I would sneak out of them or skip them altogether and go straight to my grandmother Irene's house instead. Although I regret that I am missing this important life skill, I can drive a powerboat pretty well and I wouldn't have given up that time with her for anything. Her deal was that I was allowed to bail on sailing, but I had to do whatever she wanted which usually included "working" in her garden, helping her make dinner, chicken stock, cookies, etc, or running errands (which always included a trip to the penny candy store where I was allowed to spend $1 on whatever I wanted). Sailing started at 9am but I usually ended up staying well into the afternoon or evening, and spent the night pretty often even though our house was just down the street. One of the things I remember her making one night was Shrimp Scampi- a garlicky, buttery, winey pasta dish that I told her I would love to eat even though I had never had it before. But it does have a great name, and it did end up being one of my favorite dishes. But then again, I never disliked anything she made so I'm not surprised that this one didn't disappoint. We ate this in the library, watching Tom Brokaw on the news, with individual tray tables, but this is definitely a dish you could serve in the dining room. My mom still makes this for us in the summer, and no one has ever been disappointed nor are there ever any leftovers! The ingredients are all pretty inexpensive yet make an impressive dish. If you have friends that are not pasta eaters (thanks Dr. Atkins), you can serve the shrimp with the sauce over a bed of lettuce. If you have non seafood eaters, this is also awesome if you sub in chicken breasts cut into slices. The variations are equally delicious, but I prefer the traditional pasta version with good french bread and a green salad on the side.


Ingredients:
-4 tbs butter
-4 tbs olive oil
-2 shallots, minced
-4 cloves of garlic, minced
-1 tsp crushed red pepper flakes (more or less depending on how hot you want it)
-1/2 cup white wine (I used chardonnay, pinot grigio would have been fine as well)
-juice of 1 lemon
- salt and pepper to taste
-1 box or 1 lb of linguine
-2 tbs fresh chopped parsley
-1 lb of shrimp, deveined, and shells off

Directions:
-Boil salted water for the linguine. Cook the pasta while you are making the sauce (sauce takes about 15 minutes total once you have chopped everything)
-Melt the butter in the olive oil. Saute the shallots, garlic and red pepper flakes in the oil and butter until the shallots are translucent.
-Add the white wine and lemon juice. Bring mixture to a boil and simmer for about 5 minutes or until the alcohol in the wine is cooked off.
-Add the shrimp and cook for 2-3 minutes until they are pink and no longer translucent.
-Stir in the chopped parsley.
-Add the cooked pasta to the sauce and shrimp. Toss everything together with a couple of tablespoons of pasta water, if needed. 
-Serve on plates or big pasta bowls. You can offer parmesan cheese- it is typically not supposed to be mixed with seafood, but plenty of people do it and they are still here to talk about it so it's your call.


Monday, October 29, 2012

Kendall's Mexican Chicken

I was over at my friend Kendall's house a while ago and she was very busy pouring all sorts of ingredients into her crock pot before we went to lunch. I was curious so asked her what she was making, and she told me about this mexican chicken stew sort of thing. I was unsure as to how it would turn out because I am not that big of a crock pot user, but decided to try it anyway. I was totally blown away by the results- it was one of the best things I've ever eaten on a tortilla! If you don't have a crock pot or slow cooker, you can put the ingredients in a dutch oven and cook at 200 degrees for 8 hours, or you can speed up the process and cook everything on the stove in a pot at a low temp. I think the long cook time really made all of the flavors blend together well and made the chicken pull apart nicely. This is something you can throw in the pot before you go to work and have a really nice dinner when you get home, or you can spend all day Sunday watching it cook which is what I did. I ended up freezing the chicken in 2 person servings which will be really nice in a couple of weeks when I'm in the mood for it again, or have a friend over for dinner. I served this with sour cream and chopped cilanto with tortillas on the side, but it would be delicious over rice, sprinkled with cheese, etc. This is also a great meal because you can theoretically keep all of the ingredients on hand easily (chicken breasts in the freezer) and make it on a whim without having to go to the grocery store.
Ingredients:
-1 package chicken breasts
-1 jar of salsa (I used medium, but mild or hot are both fine depending on what level of spiciness you want)
-2 cans of Rotel tomatoes with green chilies
-1 can of corn, drained
-1 can of black beans, drained
-1 tsp of cumin
-sour cream (optional, for serving)
-cheese (optional, for serving)
-tortillas (optional, for serving)
-rice (optional, for serving)
-chopped cilantro (optional, for serving)

Directions:
-Put chicken, salsa, tomatoes, corn, beans, and cumin in a slow cooker or dutch oven (200 degrees).
-Cook on low for 6 hours, at which point you should use two forks to pull apart the chicken into small pieces. The chicken should come apart easily.
-Cook for another hour.
-Serve with sour cream and/or cheese with rice or tortillas on the side. Garnish with chopped cilantro.

Thursday, October 25, 2012

Pasta with Italian Sausage and Bell Peppers

This is another great weeknight (or weekend, or for company) pasta dish that you can make very quickly with few ingredients. It is really tasty and you get a good serving of vegetables mixed in. It only takes about 25 minutes from start to finish, so it is perfect for when you are in a rush or don't feel like doing a lot of work, but want something delicious. When I make sauces, I often times make more than I need and then freeze what is leftover in 2-4 person servings. That way, if you are feeling lazy one night but want a home cooked meal, all you have to do is defrost a container of sauce and boil fresh pasta. This particular recipe makes enough for at least 6 people, so I used a little less than half a box of pasta, half of the sauce, and froze the rest (of the sauce). Depending on how many people you are planning to serve, cook that amount of pasta, use the sauce accordingly, and freeze what is leftover. If you are a vegetarian or are cooking for vegetarians, this dish is also great without the sausage. Serve with a basic green salad, french bread, or just by itself.

Pasta with Italian Sausage and Bell Peppers

Ingredients:
-1 box of short pasta (I used ziti, but fusilli, rigatoni or anything like that would be fine)
-2 tbs olive oil
-3 links of mild/sweet Italian sausage, taken out of the casing (twist in the middle and squeeze the meat into the pan)
-1 bell pepper, sliced thinly lengthwise (I bought 1 yellow and 1 red. I used half of each for the sauce and saved the other halves to make fajitas another night this week)
-1/2 red onion, sliced in half and then thinly lengthwise (Again, I saved the other half for the fajitas)
-1 28 oz can of diced tomatoes
-1/2 tsp crushed red pepper flakes
-1/2 cup pitted kalamata olives (optional but only if you hate olives)
-2 tbs chopped fresh basil (optional but it looks really nice)
-parmesan cheese

Directions:
-Put a pot of salted water on the stove to boil for the pasta.
-Squeeze the sausage out of the casings into a saucepan with the olive oil and brown the meat (cook until it is cooked through). Make sure you break up the meat with a wooden spoon so you don't accidentally make meatballs.
-Add the sliced peppers and red onion, saute until the onions are wilted and the peppers are soft.
-Add the can of diced tomatoes and the crushed red pepper. Bring to a simmer.
-In the meantime, boil the pasta according to the directions on the label (should be about 8-10 min).
- Add the olives to the sauce. If you absolutely hate olives then you can leave them out, but they add a really nice, salty, layer of flavor that I think really makes this dish.
-Add the chopped basil.
-Toss the sauce with the cooked/drained pasta, serve with grated parmesan cheese (again, also optional but good).


Wednesday, October 24, 2012

Chocolate Chip Cookie Pie

I love cookies. In an ideal world (which ends up being pretty often), I would eat one every day after lunch. I am pretty sure that even though not everyone is a baker, per se, everyone has made a batch of chocolate chip cookies at some point in their life. Often times you want to make a dessert that is easy to bake, easy to assemble, and easy to transport (if you are going to elsewhere for dinner). Cookies are perfect for that, but sometimes you want that delicious chocolate chip cookie taste in a different, fancier form. I have seen several recipes for chocolate chip cookie cakes and pies, so I put together this one based on several variations and I am really pleased with how it turned out! It was like a cross between a cookie, a cake, and a pie, all in one. A couple of my friends ate it by itself, just like you would a cookie (great with coffee in the afternoon). Personally, I like to eat it (and serve it) warm with vanilla ice cream (the individual slices can be reheated in the microwave for 25 seconds before serving). Regardless, it was really a delicious dessert option and took only about an hour (including baking time) to make.


Ingredients:
-1 1/2 cups flour
-3/4 tsp salt
-1/2 tsp baking soda
-1/2 tsp baking powder
-1 stick of butter (softened/at room temp)
-3/4 cup brown sugar
-1/4 cup white sugar
-2 eggs
-2 tsp vanilla
-1 cup chocolate chips
-1 cup chopped walnuts (optional, but I added them and I think everyone should- they add a really nice element to the pie)

Directions:
-Preheat oven to 350.
-Mix the dry ingredients together in a bowl. Set aside.
-With an electric mixer (or just a spoon and some elbow grease), blend the butter with the brown sugar and the white sugar until smooth.
-Blend in each of the eggs, one at a time.
-Blend in the vanilla.
-Add the flour mixture a little bit at a time and blend everything together.
-Fold in the chocolate chips and the walnuts (use a spoon or a spatula, not the blender).
-Bake at 350 degrees for 45 minutes until golden brown on top. Serve warm with ice cream, or room temp by itself.